IMPORTANT PREREQUISITE: This guide assumes your remote Linux server is already running, accessible via SSH, and has the necessary user accounts and Ansible development tools (like Python, Ansible core, etc.) installed and configured by a system administrator. If you need help setting up a server, please check out this video: Ansible Dev Server Using VS Code Remote SSH. This guide focuses strictly on connecting and configuring Visual Studio Code on the Windows client side.
Hello, fellow developers! This guide will walk you through setting up Visual Studio Code (VSCode) on Windows to connect to a remote Linux server over SSH. This setup is perfect for developing Ansible Playbooks right from your Windows machine, utilizing the powerful capabilities of a Linux environment.
OPTIONAL: Setting Up Passwordless SSH Key Authentication
For better security and convenience, it is highly recommended to use SSH keys instead of passwords. This is a one-time setup.
A. Generate an SSH Key Pair (If you don’t have one)
- Open PowerShell or the Command Prompt on your Windows machine.
- Run the following command. The
-t ed25519specifies a modern, secure encryption type.ssh-keygen -t ed25519 - The program will ask where to save the key. The default location (
C:\Users\YOUR_USER\.ssh\id_ed25519) is usually fine—just press Enter. - It will then ask for a passphrase. It’s best practice to use a strong passphrase for extra security. Type it, then press Enter.
B. Copy the Public Key to the Remote Server
You need to copy the contents of the public key (id_ed25519.pub) to the remote server’s ~/.ssh/authorized_keys file.
- Run the following command (Replace
[email protected]with your actual username and hostname):type $HOME\.ssh\id_ed25519.pub | ssh [email protected] "mkdir -p ~/.ssh && chmod 0700 ~/.ssh && cat >> ~/.ssh/authorized_keys && chmod 0600 ~/.ssh/authorized_keys" - You will be prompted to enter your password one last time.
- Once complete, your subsequent SSH connections (and the VSCode connection in Step 1) should no longer require a password.
Step 1: Connect to Your Remote Server
We’ll use VSCode’s Remote Explorer to establish a connection.
- Click the Remote Explorer icon (it looks like a monitor with a plug) on the left sidebar. Make sure the dropdown at the top is set to
Remotes (Tunnels).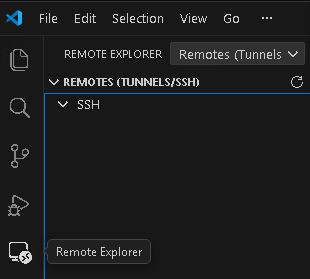
- Under the
SSHsection, click the+sign to add a new remote server.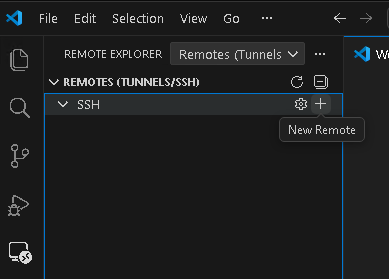
- In the prompt, type the connection information in the format:
username@hostname.
- Press Enter. Now you’ll be asked to choose an SSH config file to save this information to for future use.
- The top option saves it for your local Windows account only.
- The second option saves it for ALL Windows users on this machine.
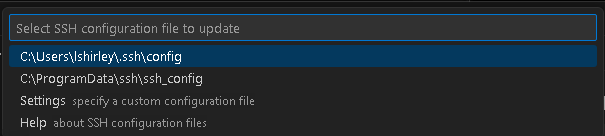
- The new host should now appear in your
SSHlist. Click the->arrow (Connect in Current Window) to open the connection in your current VSCode window, or the icon next to it to open it in a new window.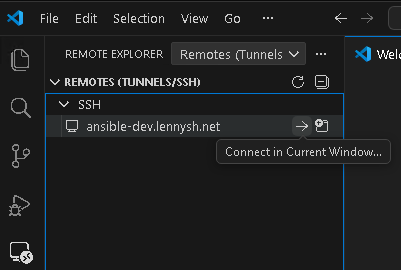
- When prompted, select the proper platform. For our Ansible development server, select Linux.

- First-time connection? If this is your first time connecting, you’ll be asked to confirm and save the server’s fingerprint. Click Continue.

- Enter your password if prompted.

- If successful, you are now connected! You’ll see your remote server’s filesystem and terminal accessible right inside VSCode.
Step 2: Install the Ansible Extension
To get the best development experience (like syntax highlighting and error checking), we’ll install the official Ansible extension directly on the remote Linux environment.
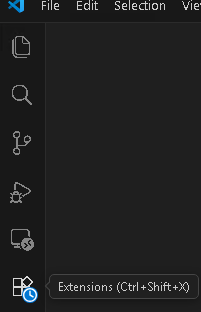
- Click on the Extensions icon (looks like four squares) on the left sidebar.
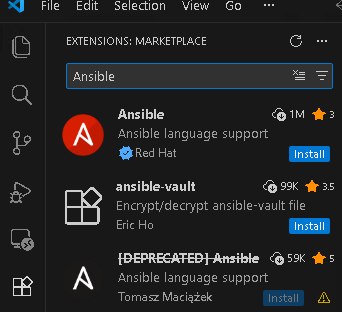
- Search the marketplace for
Ansible.
- Find the official Ansible extension provided by Red Hat and click Install.
Step 3: Start Developing!
That’s it! You’re now fully set up to start developing Ansible Playbooks remotely using a native Linux environment, all from the comfort of your Windows machine and VSCode. Happy automating!